
Drumtainer User Guide
Official Drumtainer user guide with safety, operation, maintenance, technical specifications and approved product information.

Official technical user guide
Official Drumtainer user guide with safety, operation, maintenance, technical specifications and approved product information.
Drumtainer
Safety and liability
Read this user guide carefully to learn about liability and the usage of the Drumtainer. When setting up and using your Drumtainer, remember the following:
- Read all the instructions carefully before you use the Drumtainer.
- Keep these instructions at hand for reference by you and others.
- Follow all instructions and warnings regarding your Drumtainer.
Although the product has many advantages, some restrictions must be considered. Important is the cleaning temperature, it may not exceed 60°C to prevent the Drumtainer from deformation.
Rotovia Deventer B.V. has developed the Drumtainer with the utmost care. Subject to the provisions of other agreements Rotovia Deventer B.V. and the user have entered into, Rotovia Deventer B.V. shall not be liable for any incidental or consequential damages or other damages including but not limited to, loss of profits, loss of revenue, loss of use of the product or any associated equipment, downtime and purchaser’s time or for breach of any express or implied warranty, breach of contract, negligence, strict liability or any other legal theory related to this product.
Introduction
The Drumtainer is a unique mobile container with integrated spill containment for the distribution and storage of drums. This product can serve a wide area of market segments within various industries.
The Drumtainer provides:
- Easy handling of drums with and without the use of logistical equipment
- Safe and efficient placement without lifting the drum onto spill containers
- Full protection results in safe and durable handling of the drum
- Image enhancement with color coding possibilities
With the introduction of the Drumtainer various inconveniences, which are experienced when handling drums, can be solved. The unique concept allows a safe and efficient handling of plastic drums as well as steel drums within various industries.
To minimise residue remaining in the drum, the bottom surface is sloped which allows you maximum emptying of drums. A cover on top of the product avoids water or dirt getting in. The area between the drum and the cover accommodates space for a pump unit, a cable/hose transfer opening at both sides of the product makes it possible to close the cover after connecting the drum.
The Drumtainer is also available as a wagon version which allows you to connect multiple products for efficient transport.
Furthermore, the applied castors have a low operation noise, a low rolling resistance and are floor friendly. Next to the easy to clean and corrosion resistance properties, the Drumtainer supports the company image through its attractive design and available choice of colours.
The Drumtainer is considered as an ‘Overpack’ within the framework of the regulation for transport of dangerous goods by road (ADR) and is clearly and durably marked according the ADR regulations.
The standard Drumtainer version has a DIBt approval. Deutsches Institut für Bautechnik (DIBt) is a German Governmental institute. DIBt is granting technical approvals for construction products and systems. DIBt has granted the Drumtainer a "allgemeine bauaufsichtliche Zulassungen" (approval). The Drumtainer has been approved as a spill container for drums. The Drumtainer shows this Approval on a label by stating the approval details and the official "Ü-Zeichen" (Ü mark).
Although this product has many advantages, some restrictions must be considered. See the chapter Product Handling for additional information
Components
Product description:
- Spill container, for the placement of a plastic or steel drum with a spill capacity of 400 liter and a sloped bottom surface for optimal drainage of the drum. Surfaces for safety labels and product labels are provided.
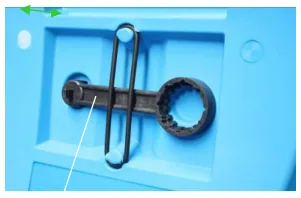
- Cover with grips at both sides for opening and closing. The grips can also be used for the transfer of cables/hoses when a pump unit is connected. A standard drum closure tool is integrated. A surface for an instruction label is provided.
- Stainless steel frame mounted under the spill container providing the necessary stability and creates a rigid platform for the wheels and other accessories.
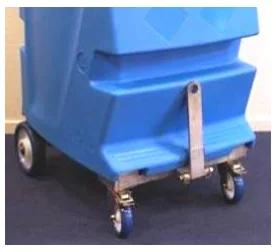
- For safe and efficient transport of multiple products, an optional pull rod combination frame is available for connecting the Drumtainers to other products or to another Drumtainer.
- 2 Fixed and 2 swivel castors with double brakes for easy manoeuvrability.
- Stainless steel fasteners for the fixation of the frame, castors and the optional pull rod combination.
- Polyamide bush between the frame fixation and the spill container to prevent wear out.
- Marking regarding handling and regulations.
- Vibration test; According to the test standard ASTM 4169-08, DC2
- Schedule E (vehicle vibration), assurance level II §12.4, ASTM D 4728-06 Method A & B.
- Overpack certification; Within the framework of the regulation for the transport of dangerous goods by road (ADR)
- DIBT certification (standard version only); Certification number Z-40.22-478
Part list
| Item number | Description | Item (qty) |
|---|---|---|
| 01 | Spill container | 1 |
| 02 | Cover | 1 |
| 03 | O-ring 123x8mm | 1 |
| 04 | Standard frame | 1 |
| 05 | Pull rod frame | 1 |
| 06 | Bumper | 1 |
| 07 | Pull rod | 1 |
| 08 | Double coiled torsion spring | 1 |
| 09 | Hexagon head bolt M12x120mm | 1 |
| 10 | Prevailing hexagon nut M12 | 1 |
| 11 | Plain washer M12 | 2 |
| 12 | Hexagon head bolt M10x25mm | 4 |
| 13 | Spring washer M10 | 4 |
| 14 | Svivel castor D125x30mm | 2 |
| 15 | Hexagon head bolt M8x20mm | 8 |
| 16 | Spring washer M8 | 8 |
| 17 | Fixed castor D200x50mm | 2 |
| 18 | Plain washer M20 | 4 |
| 19 | Split pin 3.2x32mm | 2 |
| 20 | Engraving – Overpack | 1 |
| 21 | Engraving – Arrows | 2 |
| 22 | Engraving – Handling | 1 |
| 23 | Bush for frame fixation | 2 |
| 24 | Drum closure tool | 1 |
| 25 | Engraving – Overpack/DIBT | 1 |
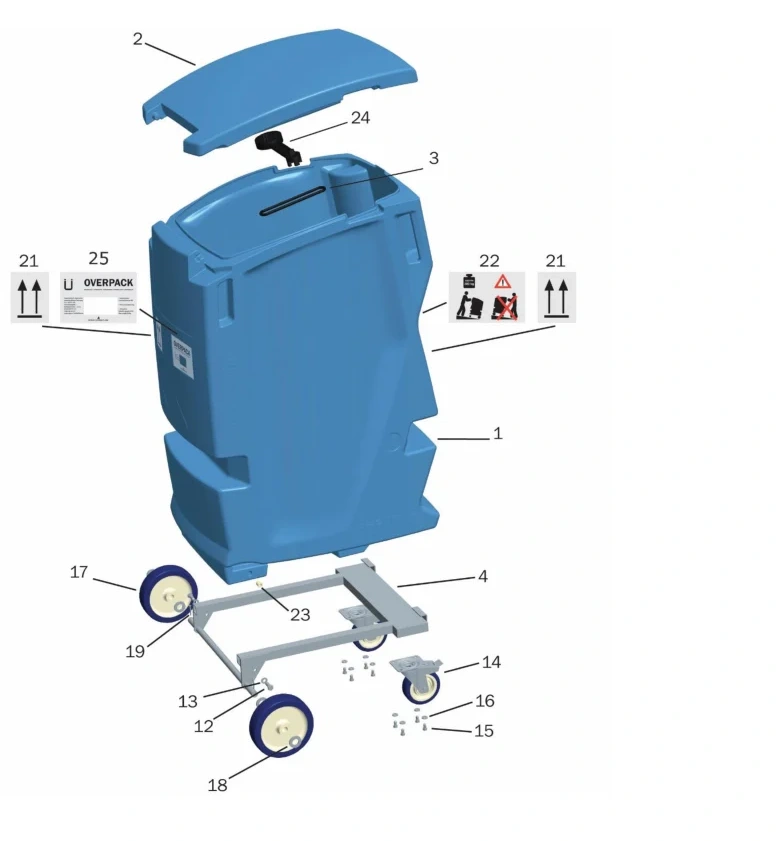
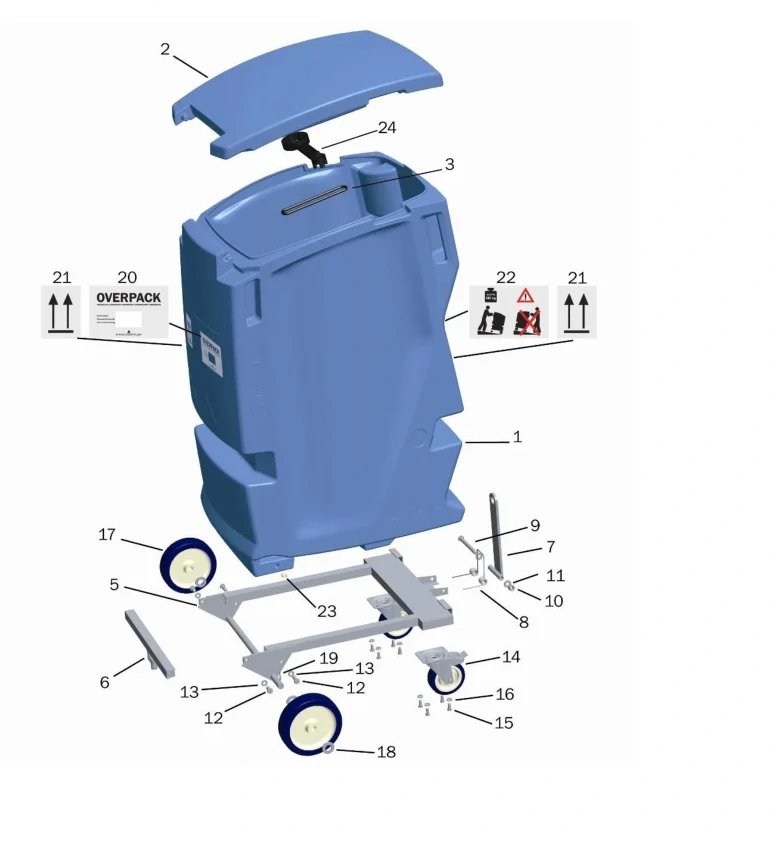
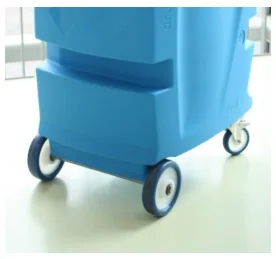
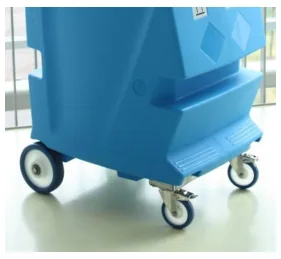
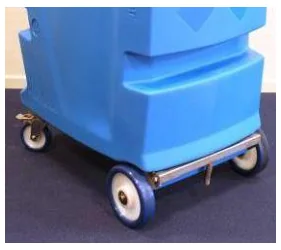
The Drumtainer is available with two different frame options.
Product handling
Handling the Drumtainer manually
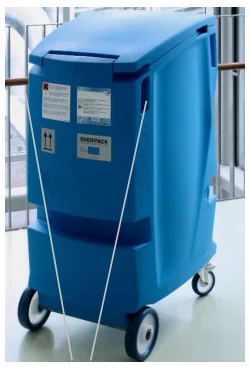
The Drumtainer can be pushed or pulled by means of the grips at the back side of the product. To create more flexibility two grips are provided at the front
Be aware of the limitations regarding doorstep heights: up to 10mm when pulled, up to 20mm when pushed.
Grips at the back side to push or pull the Drumtainer manually
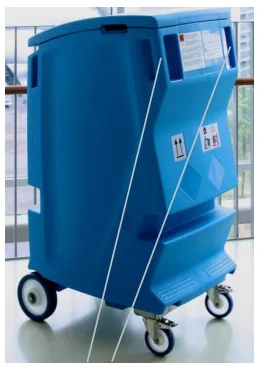
Grips at the front side creates more flexibility
Handling the Drumtainer with a forklift truck
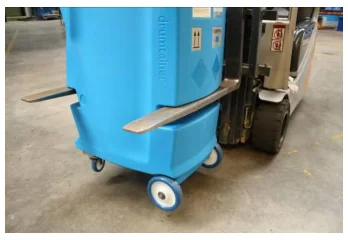
To handle the Drumtainer with a forklift truck apply a fork distance between 610mm and 650mm. Always support the product over the full length of the forks. Make sure to stand still before placing the Drumtainer on the ground to avoid unnecessary impact on the wheels and frame.
Handling the Drumtainer with a hand pallet truck
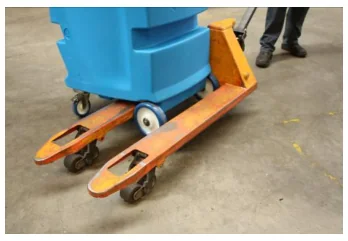
To handle the Drumtainer with a hand pallet truck, manipulate the hand pallet truck in such a way that the fixed castors are positioned between both forks. The Drumtainer can now been lifted until the fixed castors are clear from the ground. The swivel castors stay in contact with the ground and the Drumtainer can be transported in such a way.
Operating the pull rod combination
CAUTION: Make sure to use suitable equipment for the transportation of multiple products.
CAUTION: Avoid sudden start/stop for safe transportation.
CAUTION: The maximum speed is 5 km/hour.
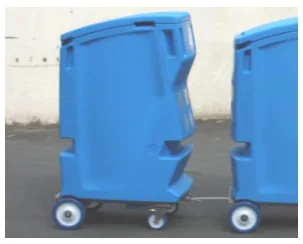
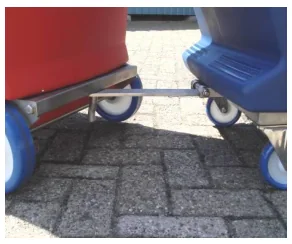
The Drumtainer can be connected to other products by means of the pull rod combination. When connected, multiple products can efficiently be transported behind an e.g. special electric truck.
To operate the pull rod, lower it in such a way that the opening is aligned with the towing hook, releasing the pull rod will connect the products to another. The torsion spring avoids sudden release.
Functionality of the cover
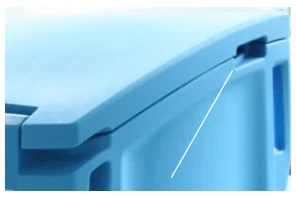
Slots for opening/closing the cover and for cable/hose transfer
Drum closure tool integrated in cover
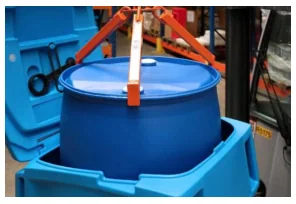
Placement of the drum
For easy and safe placement of a filled drum, drum-clamps are available.
CAUTION: The Drumtainer has a maximum capacity of 300kg.
CAUTION: Make sure to use a drum clamp which is compatible with the drum.
CAUTION: Keep safe distance between you and the drum when handling it with a drum clamp.
CAUTION: Avoid placing your hands near the opening of the Drumtainer when lowering/lifting the Drum.
Shipment of the Drumtainer
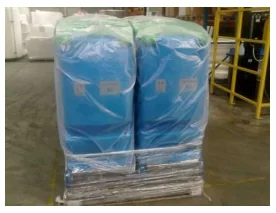
The Drumtainer can be placed on a pallet, ideally two Drumtainers on a 80x120 cm pallet.
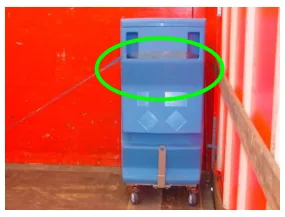
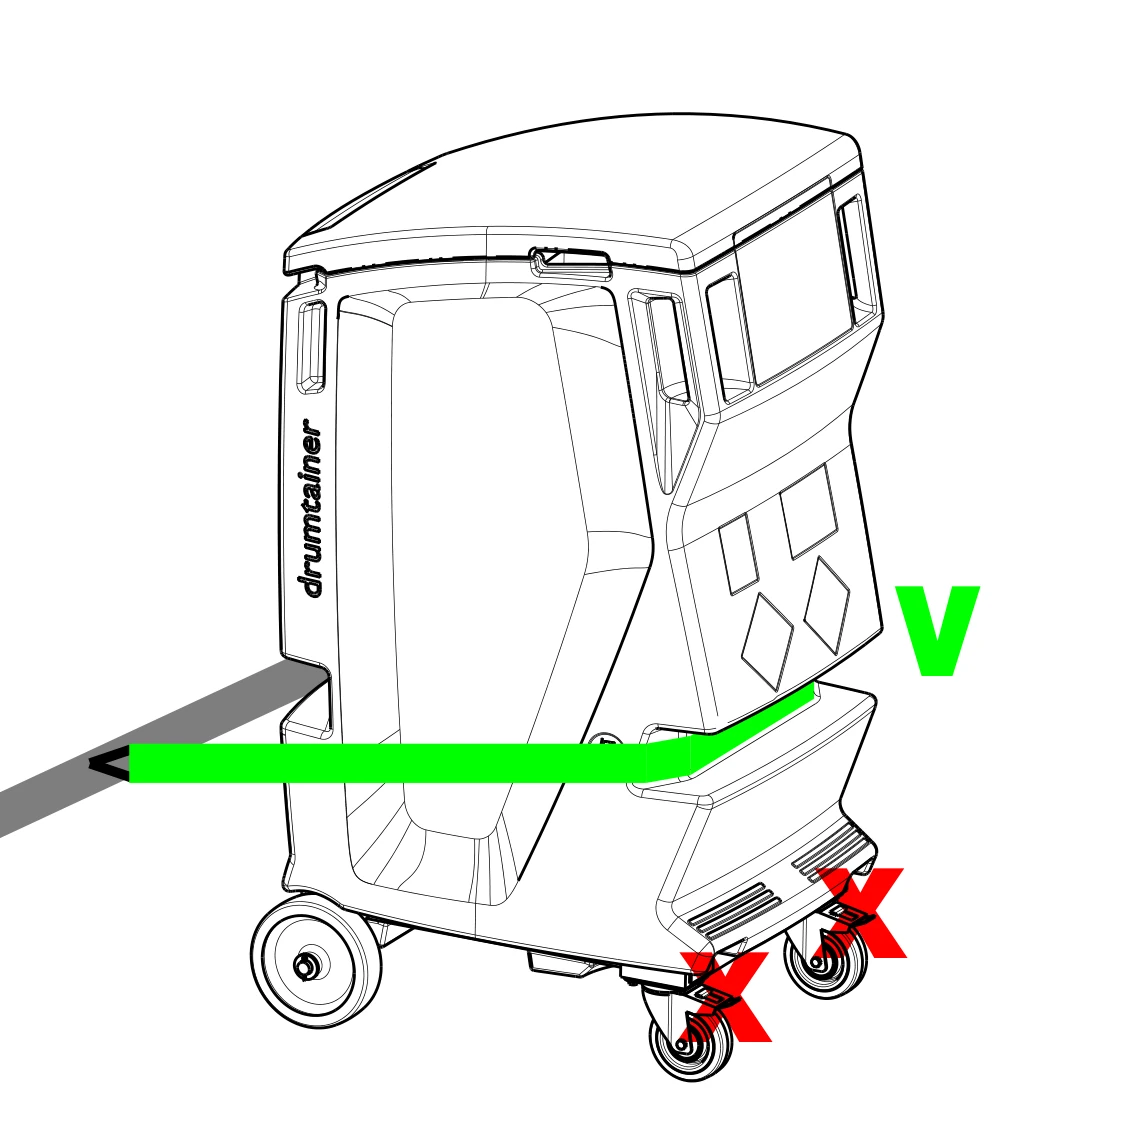
The Drumtainer can be placed directly in to a lorry or van. It’s recommended to secure the product by using straps through the grips.
When securing the Drumtainer by means of a strap, avoid too much strain on the product which can result in deformation of the Drumtainer.
Service and Maintenance
Service and Maintenance
Contact Rotovia Deventer Customer Service for the possibilities of service activities by Rotovia Deventer.
Replacing the cover
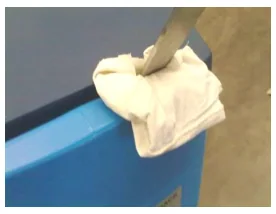
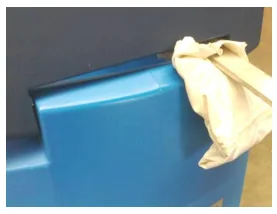
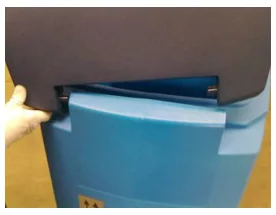
To remove the cover a bar can be placed between the container and the cover close to the hinge.
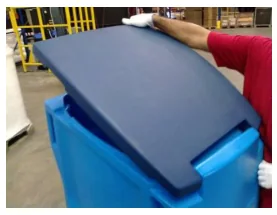
By opening the cover, it will pop out of the hinge. It’s now easing to release the cover by moving it sideways.
CAUTION: To avoid unnecessary damage, it’s recommended to use a plastic or a wooden bar or to apply some protection around the bar, e.g. a cloth or similar.
To replace the cover simply position it sideways in one hinge.
Pull the cover at the other side towards the hinge so it will snap in.
Replacing the frame
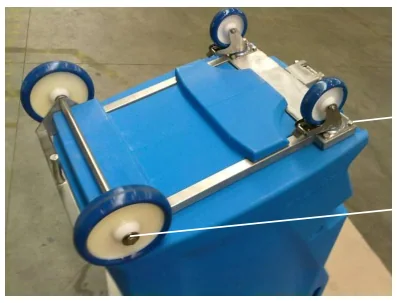
To remove the frame the product should be placed upside down.
The two fixed castors can be removed by pulling out the split pin, the two swivel castors can be removed by unscrewing the M8 bolts.
CAUTION: To avoid unnecessary damage, it’s recommended to use some protection on the floor, e.g. some cardboard, a cloth or similar.
M8 fasteners for assembling the swivel castors
Split pin for fixation of the fixed castors
To release the frame, unscrew both M10 bolts and push/pull the frame towards the back side of the product.
M10 fasteners for the fixation of the frame
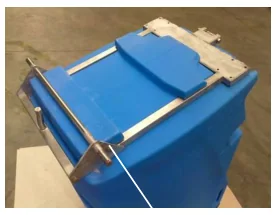
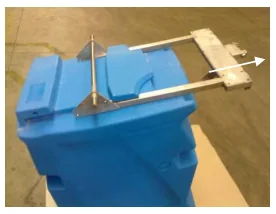
In case of the pull rod combination it’s necessary to first remove the bumper by unscrewing both M10 bolts before pushing/pulling out the frame.
M10 fasteners for the fixation of the bumper
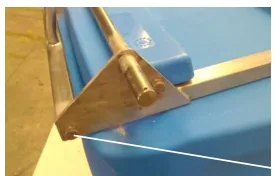
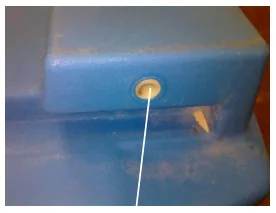
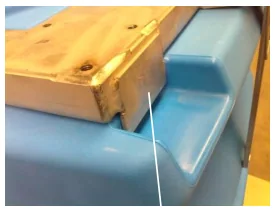
To replace the frame, make sure that the nylon bushes are placed in the two blind holes. The frame can now be pushed/pulled from the back side of the product towards the front until the two metal plates at the back side of the frame contact the plastic.
Polyamide bushes
Metal plates at the back side of the frame for the fixation of the frame
The frame can now be fixated by screwing in both M10 bolts, including a spring washer.
CAUTION: Make sure that the nylon bushes are outlined with the threaded holes in the frame before assembling the M10 bolts.
CAUTION: It’s highly recommended to apply some copper anti-seize lubricant on to the bolts before assembling them.
M10 fasteners for the fixation of the frame
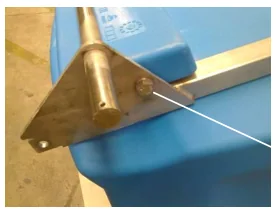
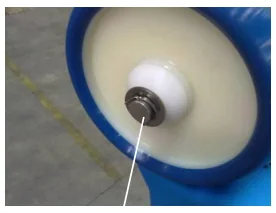
The fixed castors should be placed with a plain washer at both sides of the castor, use the split pin to fixate the castor. Tip over the ends of the split pin to prevent them from falling out.
Both swivel castors should be assembled with 4 M8 bolts, including a spring washer.
CAUTION: It’s highly recommended to apply some copper anti-seize lubricant on to the bolts before assembling them.
M8 fasteners for assembling the swivel castors
Fixed castor with a plain washer at both sides of the wheel. Split pen for fixation.
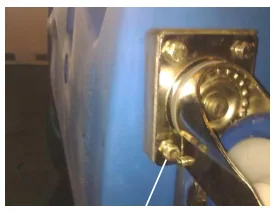
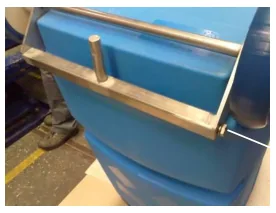
In case of the pull rod combination the bumper should be replaced and be fixed with two M10 bolts, including a spring washer.
CAUTION: It’s highly recommended to apply some copper anti-seize lubricant on to the bolts before assembling them.
M10 fasteners for the fixation of the bumper
Cleaning the Drumtainer
For information on chemical compatibility of the cleaning agent regarding the Drumtainer please contact VARIBOX Customer Service.
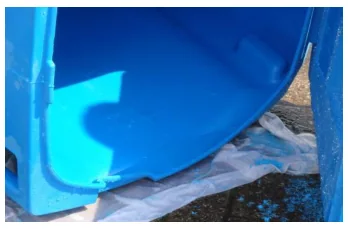
The Drumtainer and its components can be cleaned by means of a high-pressure water jet with a maximum temperature of 60˚C. In order to clean the inside, it’s recommended to place the Drumtainer on its side under a >15˚angle for optimal drainage. Do not leave water inside the Drumtainer after cleaning to avoid misunderstanding regarding spillage or leakage.
Position of the Drumtainer for optimal drainage
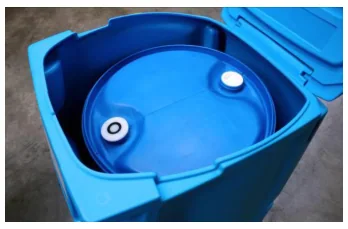
The Drumtainer is designed to enclose and secure the content of the drum in case of an emergency such as drum failure or spillage during operation. The spilled content can be pumped out by means of placing a pump unit between the drum and the Drumtainer.
CAUTION: Always apply company regulations in case of an emergency.
Space for pump unit in case of an emergency
Learning More, Service and Support
For the latest information about the Drumtainer and for service and support, please visit www.varibox-ibc.com. You will also find instructional videos about using our products.
For warranty related questions or for more information about this or more VARIBOX products, feel free to contact us:
VARIBOX Customer Service Tel.: +31 (0)570 660711 [email protected]
If the product appears to be damaged or does not function properly, please follow the advice in this instruction.
If the product still does not function, contact VARIBOX Customer Service for instructions how to obtain warranty service.